- Автоматизация
- Антропология
- Археология
- Архитектура
- Биология
- Ботаника
- Бухгалтерия
- Военная наука
- Генетика
- География
- Геология
- Демография
- Деревообработка
- Журналистика
- Зоология
- Изобретательство
- Информатика
- Искусство
- История
- Кинематография
- Компьютеризация
- Косметика
- Кулинария
- Культура
- Лексикология
- Лингвистика
- Литература
- Логика
- Маркетинг
- Математика
- Материаловедение
- Медицина
- Менеджмент
- Металлургия
- Метрология
- Механика
- Музыка
- Науковедение
- Образование
- Охрана Труда
- Педагогика
- Полиграфия
- Политология
- Право
- Предпринимательство
- Приборостроение
- Программирование
- Производство
- Промышленность
- Психология
- Радиосвязь
- Религия
- Риторика
- Социология
- Спорт
- Стандартизация
- Статистика
- Строительство
- Технологии
- Торговля
- Транспорт
- Фармакология
- Физика
- Физиология
- Философия
- Финансы
- Химия
- Хозяйство
- Черчение
- Экология
- Экономика
- Электроника
- Электротехника
- Энергетика
Tree Branch. SUPPLIES
Tree Branch
With brown yarn, ch 4.
Round 1: Slst in to the first ch to form a ring.
Round 2: 1 sc in each st around.
Rounds 3-13: Rep round 2 around 11 times.
Round 14: * 2sc in next st, sc*, rep * – * around.
Round 15: 1 sc in each st around.
Fasten off and leave a long yarn tail enough to sew the branch on to the trunk as well as sewing on the clementines.
(optional – chopstick method) Do not stuff. Simply place the chopstick in to the tree branch, then use the long yarn tail to attach to the trunk. Repeatforsecondtreebranch.
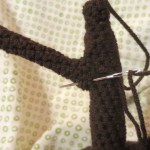


(stuffing only method) Sew on to trunk.
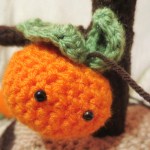
Once the tree branches are done, you’re ready to sew the clementines on to the tree! Using the long yarn tail left from the branch, attach clementines randomly on to the tree. Seephotosforreference.
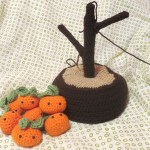


I made a few more leaves to attach on to my clementine tree because it looked a bit empty when I finished it. If you’d like to do the same, simply follow the leaf pattern in my clementine amigurumi pattern and sew on to the tree.
SUPPLIES
· Crochethook H/5. 00mm
· Safetyeyes 6mm
· Yarn needle (I use Clover Chibi Bent Tip Needle Set )
· Fiberfill forstuffing
· Any worsted weight yarn, I used the following in my sample:
· RedHeartSuperSaver, Pumpkin
· LionBrandVanna’sChoice, Fern
|
|
|
© helpiks.su При использовании или копировании материалов прямая ссылка на сайт обязательна.
|