- Автоматизация
- Антропология
- Археология
- Архитектура
- Биология
- Ботаника
- Бухгалтерия
- Военная наука
- Генетика
- География
- Геология
- Демография
- Деревообработка
- Журналистика
- Зоология
- Изобретательство
- Информатика
- Искусство
- История
- Кинематография
- Компьютеризация
- Косметика
- Кулинария
- Культура
- Лексикология
- Лингвистика
- Литература
- Логика
- Маркетинг
- Математика
- Материаловедение
- Медицина
- Менеджмент
- Металлургия
- Метрология
- Механика
- Музыка
- Науковедение
- Образование
- Охрана Труда
- Педагогика
- Полиграфия
- Политология
- Право
- Предпринимательство
- Приборостроение
- Программирование
- Производство
- Промышленность
- Психология
- Радиосвязь
- Религия
- Риторика
- Социология
- Спорт
- Стандартизация
- Статистика
- Строительство
- Технологии
- Торговля
- Транспорт
- Фармакология
- Физика
- Физиология
- Философия
- Финансы
- Химия
- Хозяйство
- Черчение
- Экология
- Экономика
- Электроника
- Электротехника
- Энергетика
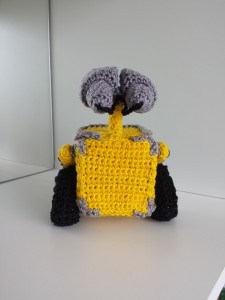
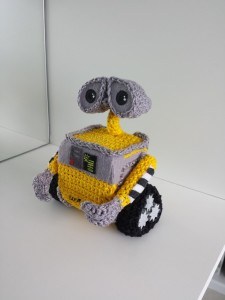
Wall-e Pattern
Posted by MiaHandcrafter | Thursday, January 14th, 2016 | Patterns
Hi! How are you guys? It’s been a while since my last pattern, hehe. I’m sorry about that, but lately, I’m rarely crocheting. This doesn’t mean that I’m tired of crocheting or anything like that, crochet still my passion. What is happening is that I don’t have time to crochet at the moment, because I’m focusing in my career.
I’m sure that you all are very excited with the last Star Wars movie, right? : D Its is A-W-E-S-O-M-E!! I really would like to make a BB-8 pattern, but I can’t find any time right now. _. Maybe one day right?
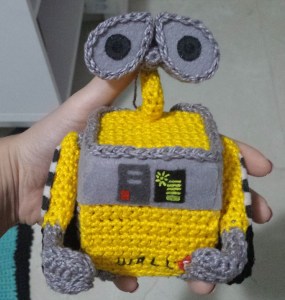
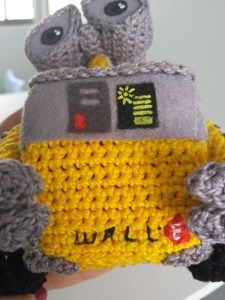
Well, today’s pattern is Wall-e from the same name movie, which is one of my favorites. It’s a very lovely and well done movie. I tried to make a small pattern, with just the essencial details and not too complicated. However… in the end I think that the pattern is a bit complicated, it has too many pieces… *Sigh* I’m sorry guys >. <
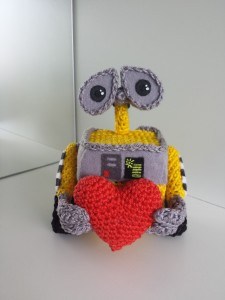
He wants to give his heart to Eva.
Materials:
– Yellow yarn (I used Anne by Circulo, which is a Fingering / 4 ply (14 wpi));
– Grey yarn (I used Anne by Circulo, which is a Fingering / 4 ply (14 wpi));
– Black yarn (I used Anne by Circulo, which is a Fingering / 4 ply (14 wpi));
– EVA;
– 2mm crochet hook;
– Fiberfill;
– Tapestry needle, needle and scissors;
– Wire to his neck and to his arms;
– Contact glue;
– Paintbrush, black, white, grey, red and lime fabric paint;
– White and grey felt;
– Black, white and red thread to embroider his name.
Notes:
– I always do my crochet works using continuous rounds. I will let you know when you have to join rounds;
– Everytime I will do a crochet work, the first thing I do is take a look in the entirely pattern before start doing it, so, I can have an idea of how the pattern works. Well, I recommend you to do the same;
– For sewing the pieces together you will use the tapestry needle;
Recently, I’m having a hard time to answer all the questions sent to my email and the comments. I’m sorry that I’m not able to answer your doubts. However, if you have any doubt, I’m sure that it is worth to leave a comment here, because even if I can’t answer you, I’m sure that someone in the community will try to help you out ^^
Pattern:
– Body (make 6 – yellow yarn):
Row 1: ch 14, sc 13 (13)
Row 2-15: sc in each sc (13)
Finish off and leave a long tail for sewing.
1. Sew all the pieces together, except the top.
2. Cut a cube shaped piece of foam. You are not going to stuff the cube with fiberfill, but with this foam.
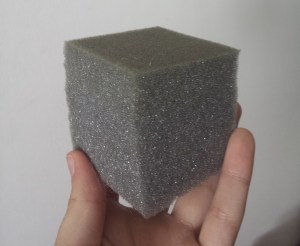
3. Insert the foam inside the crochet cube, then sew the rest of the top.

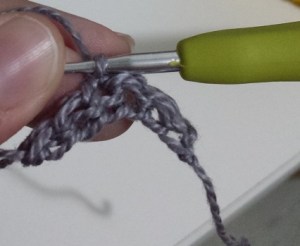
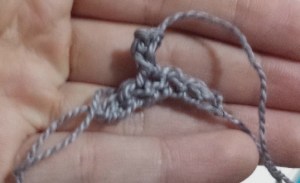
– Grey edge on the top of his body:
Row 1: Make 38 sc using Moogly’s method, which does not need a foundation chain (38)
Finish off.
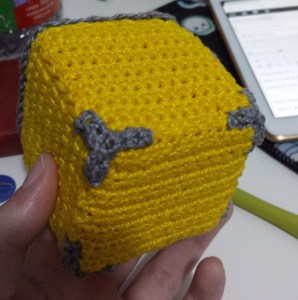
This is how the top edge should look like when sewn to his body:
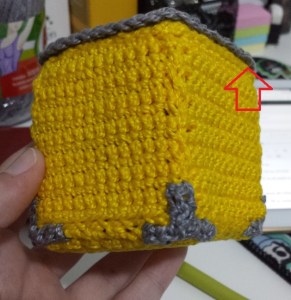
Front
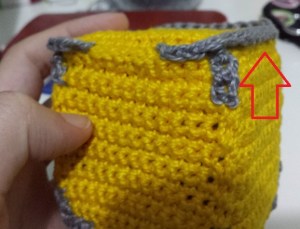
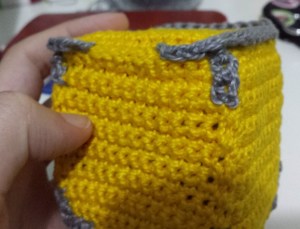
Back
– Grey corners in “y” shape from the bottom (make 4):
Row 1: Make sc 5 using Moogly’s method, which does not need a foundation chain (5)
Cut the yarn and leave a long tail for sewing.
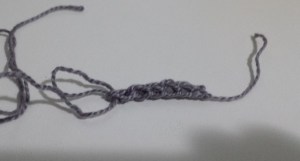
Attach the yarn on the 3rd stitch and make 2 sc.
Finish off.
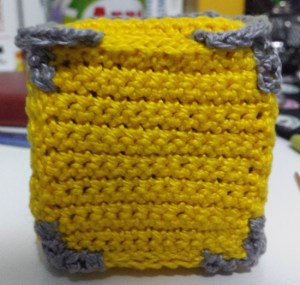
This is how this piece should look like when sewn to his body:

– Grey corners from his back on the top (make 2):
Row 1: Make sc 2 using Moogly’s method, which does not need a foundation chain (2)
Finish off
– Grey detail located on the sides (make 2):
Row 1: Make sc 17 using Moogly’s method, which does not need a foundation chain (17)
Finish off.
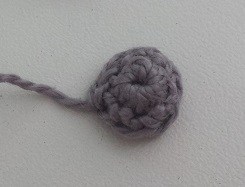
– Grey piece where his arms are attached (join rounds – make 2):
Round 1: 6 sc in MC (6)
Round 2: sc in each sc (6)
Finish off.
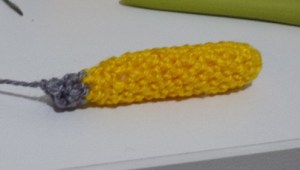
– Arms (make 2):
**Start with yellow yarn
Round 1: 8 sc in MC (8)
Round 2-14: sc in each sc (8)
Round 15: crochet only in the back loops. (sc 2, dec) 2 times (6)
**change to gray yarn
Round 16-17: sc in each sc (6)
Finish off.
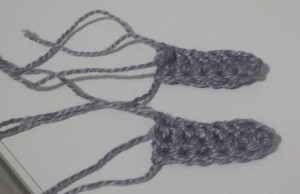
– Fingers (make 4 – grey yarn):
Row 1: Make 6 sc using Moogly’s method, which does not need a foundation chain (6)
Row 2: sc in each sc (6)
Finish off and leave a long tail for sewing.
– “Legs” (make 4 – black yarn):
Row 1: Make 4 sc using Moogly’s method, which does not need a foundation chain (4)
Row 2-32: sc in each sc (32)
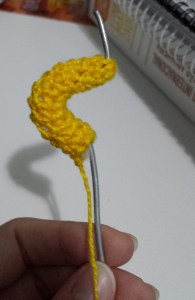
– Neck (yellow yarn):
Round 1: 6 sc in MC (6)
Round 2-10: sc in each sc (6)
Finish off and leave a long tail for sewing.
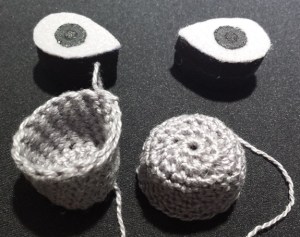
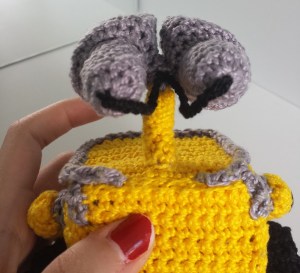
– Eyes:
. Tube (make 2):
Round 1: Make 10 sc in MC (10)
Round 2-8: sc in each sc (10)
Finish off.
. Front part (make 2):
Round 1: 8 sc in MC (8)
Round 2: inc (16)
Round 3-9: sc in each sc (16)
Finish off.
. Grey cylinder between the eyes:
Round 1: 6 sc in MC (6)
Round 2-5: sc in each sc (6)
Round 6: dec (5)
Finish off.
Assembly:
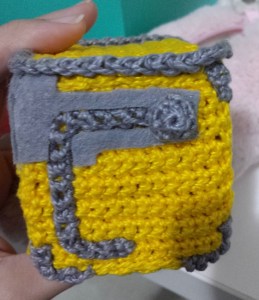
1. Make his body. Sew all the squares together, except the top, put the foam inside and sew the top square as explained before;
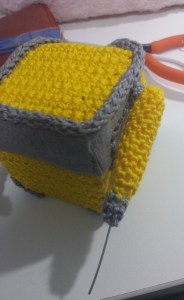
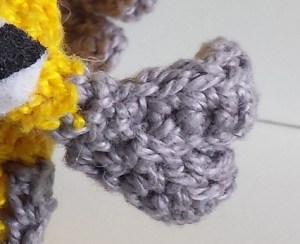
2. Sew the “Grey edge on the top of his body”:
3. Sew the “Grey corners in “y” shape from the bottom”:
4. Sew the “Grey corners from his back on the top”:
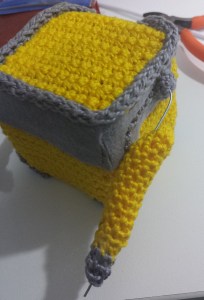
5. Using grey felt make two pieces like the one in this photo (they are placed each one in each side) and glue them to his body:
6. Using grey felt make the front ractangle and glue it to his body:
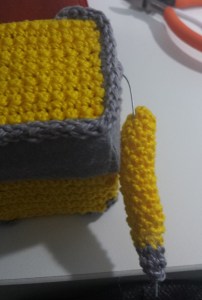
7. Put some fiberfill inside and glue the “Grey piece where his arms are attached” in the same place as shown in the photo:
8. Now, before sewing his arms, it’s necessary to insert a wire inside his body to keep his arms in place. To be able to insert the wire inside the cube I had to pierce with a sharp needle and then enlarge the small hole with a larger needle. After that I was able to insert the piece of wire:
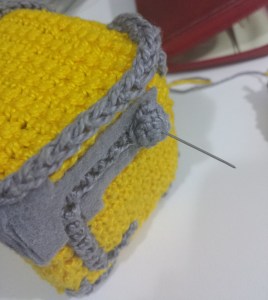
Pierce the cube with a sharp needle

Enlarge the small hole with a larger needle
Insert the wire.
Bend the wire near his body and insert his arm through it.
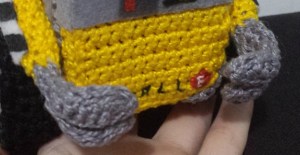
9. To make his fingers sew two pieces together:
Then, cut two pieces of wire (they need to be bigger than the fingers) and bend it to make it double.
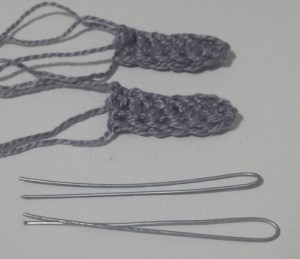
After that insert the wire inside his fingers
Finally, insert the wire inside his arm and sew his fingers:
10. Using a piece of white felt and black fabric paint make this detail of his arms:
11. To make his legs first cut two pieces of a thick wire in the size of his legs and bend it in this shape (get an idea with the photos of the complete wall-e):
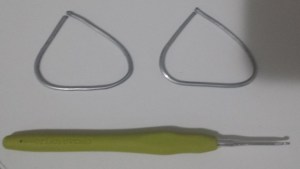
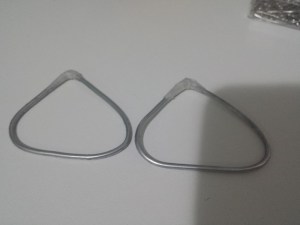
unite the loose tips with adesive tape
Sew two pieces of his leg with the wire inside:
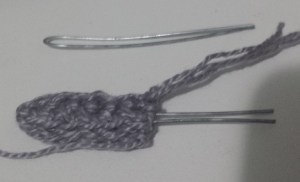
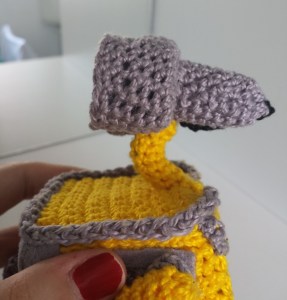
12. Cut a piece of wire and try to shape it like in the photo bellow. This is going to be his neck.
First, insert the already shaped wire into his neck:
Then, insert the wire into his body:
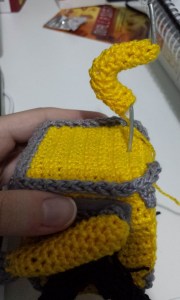
After that, sew his neck to his body:
13. Now you are going to sew the “Grey cylinder between the eyes” to the top of his neck:
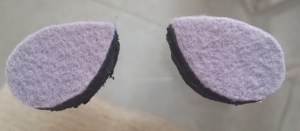
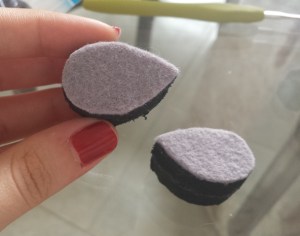
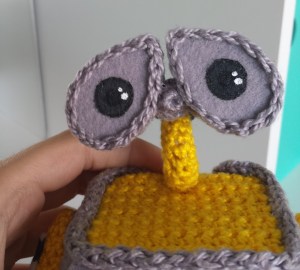
14. To make his eyes I used EVA. I cut two pieces each one for each eye:
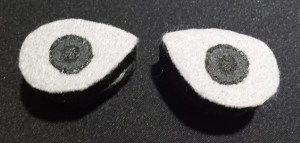
Then, I cut two pieces of grey felt and glued into the eva.
Finally, I painted his pupils and iris:
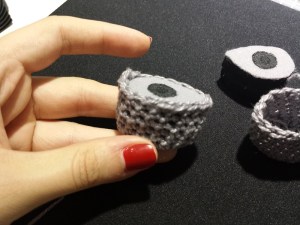
After that, you are going to insert his eva eyes inside the “Front part” of his eyes and glue them together:


Finally, sew his eyes to the “Grey cylinder between the eyes”:
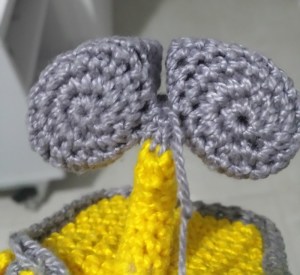
Now, stuff each “Tube” with fiberfill and glue it to the back of each eye.
Don’t forget to make the reflection in his eyes:
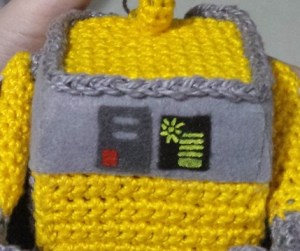
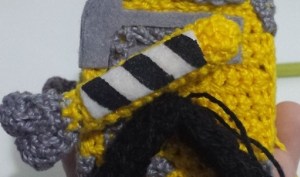
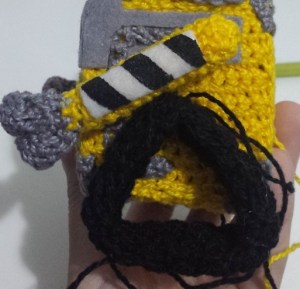
15. Make the details in his front painel using felt and fabric paint and embroider his name:
16. With a black yarn and using only crochet chains make this two wires and sew each one into each eye and both into the “Grey cylinder between the eyes”:
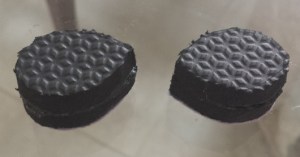
17: Using EVA I made some gears and painted them with silver paint:
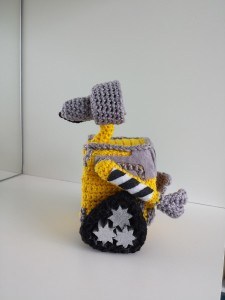
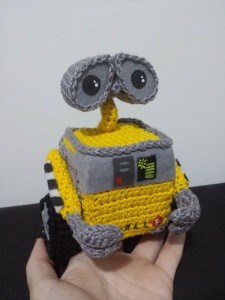
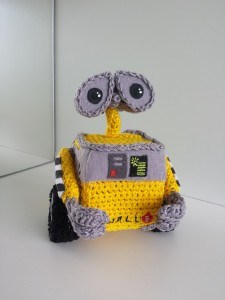
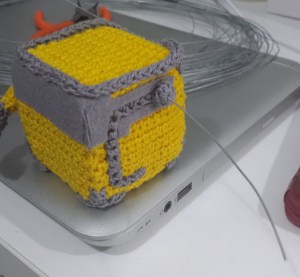
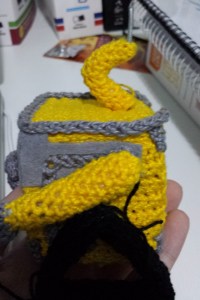
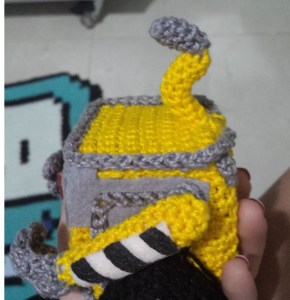
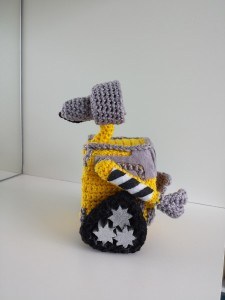
That’s it, here are some more photos to use as reference:
|
|
|
© helpiks.su При использовании или копировании материалов прямая ссылка на сайт обязательна.
|